KEY TAKEAWAYS
- Vinegar vs. Unsealed Grout: While undiluted white vinegar is effective for mold removal, avoid using it on unsealed grout or stone tile as it can degrade the material
- Bleach Precautions: Chlorine bleach is effective but can be hazardous. It should not be used on unsealed grout and requires protective gear and good ventilation
- Regular Maintenance: To prevent mold, apply a quality sealer to the grout, fix any leaks, clean your shower weekly, and ensure good air circulation in the bathroom
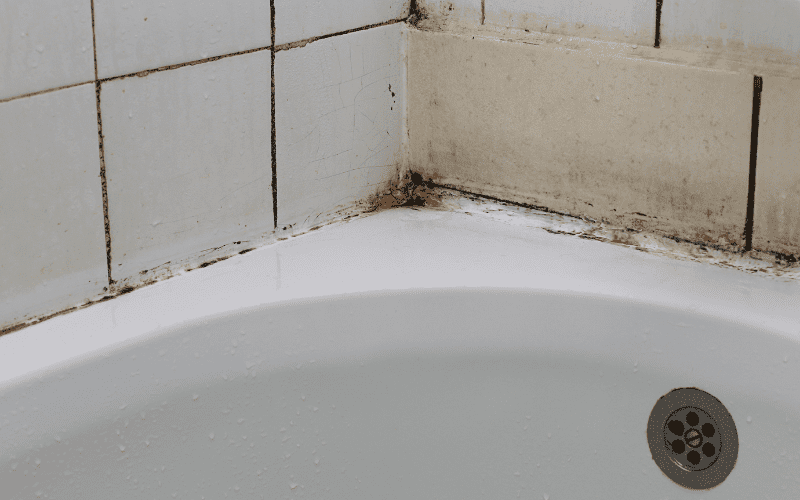
Mold growth is an almost unavoidable battle in even the cleanest homes. None of us wants to live with it, yet nearly half of American households still suffer from mold and the dampness that causes it. And in an area subjected to hot steam and spraying water every day, it’s no surprise that shower grout is a favorite breeding ground.
Luckily, mold may be persistent, but it’s nowhere near as tough as your tile and grout. With a little know-how, you’ll discover several solutions to remove mold without damaging your installation. When moldy tile walls and floors stop you from enjoying your daily bathing routine, we’ll show you the best way to clean shower grout mold to keep your bathroom looking incredible!
What Is the Best Mold Remover for Shower Grout?
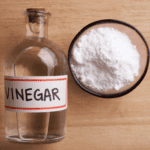
Undiluted white vinegar in a spray bottle is the best all-around mold remover for shower grout. Spray the grout, and let the vinegar sit for at least one hour. Rinse with fresh water, and wipe down the walls. Use a stiff brush to remove challenging, stuck-on mold growth.
Distilled white vinegar’s cleaning versatility solves countless issues in the shower, from mold removal to cleaning up soap scum. If your shower door tracks, caulk, and glass door also need a deep clean, you can accomplish everything with one cleaning solution. As a lung-safe and effective mold killer, vinegar is an ideal first defense when spots appear.
Warning! The acidity that makes vinegar effective on mineral deposits and mold can also degrade grout. Avoid using white vinegar on unsealed grout or stone tile. Do NOT mix vinegar with bleach or hydrogen peroxide, as it can create hazardous acids and gasses.
Bleach
Chlorine bleach diluted in a 1:4 bleach-to-water ratio is another effective way to clean mold from sealed shower grout. Mix the bleach solution in a bowl and apply it to moldy shower walls with a clean rag. Let it dwell for 20–30 minutes before scrubbing with a stiff grout brush. Rinse with warm water.
Warning! Bleach can be hazardous to your health and your shower if used incorrectly. Keep the room well-ventilated, and wear protective rubber gloves, mask, and clothing while working. Do NOT use bleach on unsealed grout, as it can degrade the porous material and lose effectiveness as it sinks in. As it sits, bleach can also strip color from materials, making it a poor choice for colored grout.
Baking Soda
Baking soda is a gentler and safer bleach alternative to use on mold in shower grout, including colored and unsealed grout. It’s an excellent first choice for emergent mold stains that can also power through built-up soap scum.
Make a thin baking soda paste with water, and apply it to the mold-stained shower tiles and grout. Let the paste sit for 10–20 minutes. Scrub the affected area with a stiff bristle brush. Use an old toothbrush for thin grout lines. Finish by rinsing with water and wiping down the walls with a clean towel.
Tip: For a cleaning boost, baking soda is one of the few ingredients safe to mix with bleach. Baking soda makes bleach more effective by holding it in a sticky paste rather than letting it run down the shower wall.
Make a cleaning paste for stubborn mold stains by adding a little household bleach. Apply it to the affected areas as you normally would, letting it sit for several minutes before scrubbing. Because you’re adding bleach, avoid using the solution on unsealed or colored grout.
Hydrogen Peroxide
Hydrogen peroxide is one of the best options for removing mold from unsealed and colored grout. Unlike bleach, peroxide can work on porous materials, exactly where mold wants to grow.
Pour undiluted 3% hydrogen peroxide into a spray bottle. Feel free to use higher strength 6% or 12% hydrogen peroxide for more effective mold removal. Spray the shower walls liberally with the cleaner. Let it sit for 10 minutes. Scrub with a stiff brush, and wipe down the tile with a damp sponge.
Killing mold spores with deep roots is challenging, even if you see it come off the surface you’re cleaning. You can clean your unsealed or colored grout with hydrogen peroxide without worrying about degrading or discoloring it. The same solution will also remove mold from shower caulking without damaging the seal.
Tip: Using hydrogen peroxide to clean mold from shower grout can get easier by throwing baking soda back in the mix. Make a thick paste, swapping water with hydrogen peroxide, and apply it to the mold growth. Allow it to sit for 10 minutes before scrubbing and wiping it away.
Oxygen Bleach
If you don’t have any hydrogen peroxide on hand, you can clean grout with mild mold staining using oxygen bleach from the laundry room.
Mix oxygen bleach with hot water according to the package directions. Agitate the mixture until the crystals dissolve. Add it to a spray bottle to spritz the mold, or mix it in a bowl and dab it on with a sponge. Let the solution dwell for about 15 minutes. Scrub out the stains, and rinse with fresh water to remove the oxygen bleach solution.
Borax
With higher alkalinity than baking soda, we can consider Borax an upgrade for cleaning grout on shower walls and the bathroom floor. Mix Borax with water in a bowl to form a thick paste. Apply the paste to the grout mold, and let it rest for about 30 minutes. Scrub with a stiff brush before wiping clean with a towel.
Dish Soap
Dish soap won’t kill microbes in the shower, but it’s a safe and convenient cleaning solution when you notice surface mold starting to appear on tile and grout. Mix dish soap in water, and scrub it into the mold growth with a stiff brush. Alternatively, you can apply some dish soap to the affected areas, then scrub. Rinse with cold water to remove the soap before wiping it down with a clean towel.
Rubbing Alcohol
Rubbing alcohol is yet another go-to agent for cleaning mold and mildew on porous and non-porous surfaces. The typical bottle of 70% isopropyl alcohol will work fine, or you can use a more concentrated product.
Clean the grout with soap and water and allow it to dry before applying the rubbing alcohol cleaner. Mix a solution of half rubbing alcohol and half water. Spray or blot the solution onto the moldy area. Let the solution work for about 15 minutes before wiping it clean.
Commercial Solution: RMR-86
There’s nothing wrong with a commercial product when the DIY mold cleaner isn’t cutting it. RMR-86 Instant Mold and Mildew Stain Remover Spray is a high-powered cleaner using bleach as its active ingredient.
You’ll need protective gear and a respirator mask during use because of the cleaner’s potency. But as it promises to start cleaning mold in only 15 seconds, it’s an exceptional time-saver for cleaning even the worst moldy grout.
How to Prevent Mold Growth on Grout
Preventing mold in shower grout is always preferable to cleaning it. In a moisture-rich environment, stopping mold growth is an ongoing chore, but following these tips will make it seem effortless.
Apply a Sealer
A quality sealer is the first step in keeping mold at bay unless you have epoxy grout, which doesn’t need extra protection. Penetrating sealers soak into the grout’s pores, stopping moisture and contaminants from infiltrating.
Despite the effectiveness of various cleaners against surface growth, mold spores can bury themselves in porous materials. Removing mold in its entirety becomes tricky at that point. You may clean with bleach, alcohol, vinegar, and other effective mold removers with decent immediate success. But studies show that inactivated growth can spread again once you remove the antifungal agent and give the mold an environment where it will thrive.
Without sealing your grout, you could get locked in an ongoing routine of cleaning mold in the shower. Sealants will also give you more viable cleaning solutions, including highly effective yet corrosive options like bleach and vinegar. Preventing mold growth will be faster and more straightforward, and if moldy or mildew spots finally appear, you’ll have no shortage of methods to remove them.
Check for Leaks
Mold needs moisture and organic materials to grow. While you provide plenty of the former during your daily bathing routine, any leaky faucets, pipes, and showerheads will also supply it without your knowledge or control. Fixing leaks likely won’t solve all your mold problems, but it will reduce the chance of it appearing.
Clean Regularly
Clean your shower once weekly to keep mold to a minimum. While you’re tackling minor mold and mildew on the tile and grout, don’t forget your door and especially your shower caulk.
Clearing away old soap residue and grime will remove potential spots for mold to grow while removing minor mold spots before they can expand into something worse. When you have a shower cleaning routine, you’ll have fewer problems keeping mold away with gentler, less toxic options.
Air Circulation
Excess moisture and humidity that cause mold are often the results of poor airflow in the bathroom. Use your exhaust fan liberally when bathing. Keep it running while showering, and leave it on for about a half-hour afterward.
As long as there’s still moisture on the window, walls or mirrors, you should keep the fan on. Or, open the bathroom window and door after you hop out of the shower for even more air circulation.
Wipe Down Tiles
Get rid of the water, and you’ll make significant gains in stopping mold from setting in. Grab a cheap yet high-quality squeegee like the Mr. Siga Multi-Purpose Silicone Squeegee to wipe down the tile walls after your shower. Mold won’t have anywhere to grow without the water, and you’ll make your weekly cleaning much more efficient.
Use Mold-Resistant Grout
When mold roots deeply enough, it can be impossible to eliminate with any cleaning solution. In worst-case situations, you’ll have to remove damaged grout or tiles to clean out every last bit of mold and prevent it from spreading again. It’s a pain to replace, but at the same time, this could be an excellent opportunity to upgrade your grout and give yourself an edge in the fight against mold in the shower.
Mold-resistant grout like epoxy or single component grout can make an enormous difference in the shower. Although they’re more expensive and difficult to apply, these grouts will provide better resistance to mold, general staining, and breakage, all without needing a sealant.
How Do You Get Black Mold Out of Tile Grout?
Black mold has a reputation for its relatively significant health impact, especially for those with compromised immune systems and respiratory issues. But in terms of cleaning, it’s no more challenging than any other common shower mold. Use bleach, vinegar, or another preferred mold remover, but wear protective gear and a mask to limit exposure.
How Do I Get My Shower Grout White Again?
As the stark highlight of a tile job, crisp white grout will turn even the tiniest stain into a glaring blemish. A whitening agent like chlorine bleach or a hydrogen peroxide/baking soda paste will remove mold and get your grout gleaming again. Try a steamer on tricky stains to loosen and lift the mold before applying your cleaning solution.
How Do You Remove Mold From Shower Grout Naturally?
The best natural mold removal option for your grout is vinegar. Vinegar is safe to use, inexpensive, accessible, and not harmful to the environment or indoor air quality. If you don’t have any vinegar, a baking soda paste or lemon juice are excellent lung-safe and eco-friendly alternatives to clear mold growing in your grout.
What Kills Black Mold from Bathroom Shower Grout?
You can kill black mold on surfaces with vinegar, bleach, hydrogen peroxide, and most of our recommended DIY and commercial cleaners. But removing the humid environment that allows it to thrive is crucial to the long-term integrity and safety of the bathroom. Of all places, the shower areas should be the definition of cleanliness in the home, and a little extra care to tidy the bathroom after cleaning yourself will save you tons of effort in dealing with mold.

